
Terracotta roasted garlic is one of those simple seasoning that makes everything taste better. Roasting garlic in a clay garlic baker mellows it out and gives it a soft, buttery flavor. I mix it into mashed potatoes, blend it into salad dressing, or just spread it on crackers. It's old-school cooking at its best.

We don't have a lot of shopping down here in the Keys so I go into the Salvation Army stores when I have a few minutes. There's one in Key Largo where I live, but when I head to Key West, I always stop at the Big Pine Key store. For some reason, they have a great selection plates and I can always use a few new plates.
I spotted up this Norpro Garlic Baker yesterday during my run, and it brought me right back to the 1980s. My mom had a clay pot just like it and we used it all the time.
Back in the eighties, roasted garlic had a moment. It showed up on restaurant tables from coast to coast and soon made its way into home kitchens. Everyone was roasting whole heads of garlic, spreading the soft cloves on warm bread or mixing them into pasta.
Seeing that little terracotta baker again brought so many memories!
I this recipe, I'm baking garlic in this nostalgic clay pot. It's simple to do and your whole house will smell like an old Italian kitchen on a Sunday afternoon. What could be better than that?
What's a Terracotta Garlic Baker?
A terracotta garlic baker is a small clay pot made for roasting whole heads of garlic.
It has two parts, a glazed round bottom dish and a dome-shaped lid with a hole for steam to escape.
The ceramic pot holds heat well and helps the garlic cook slowly. Before using it, you soak the pot in water for about 15 minutes so it doesn't crack in the oven.
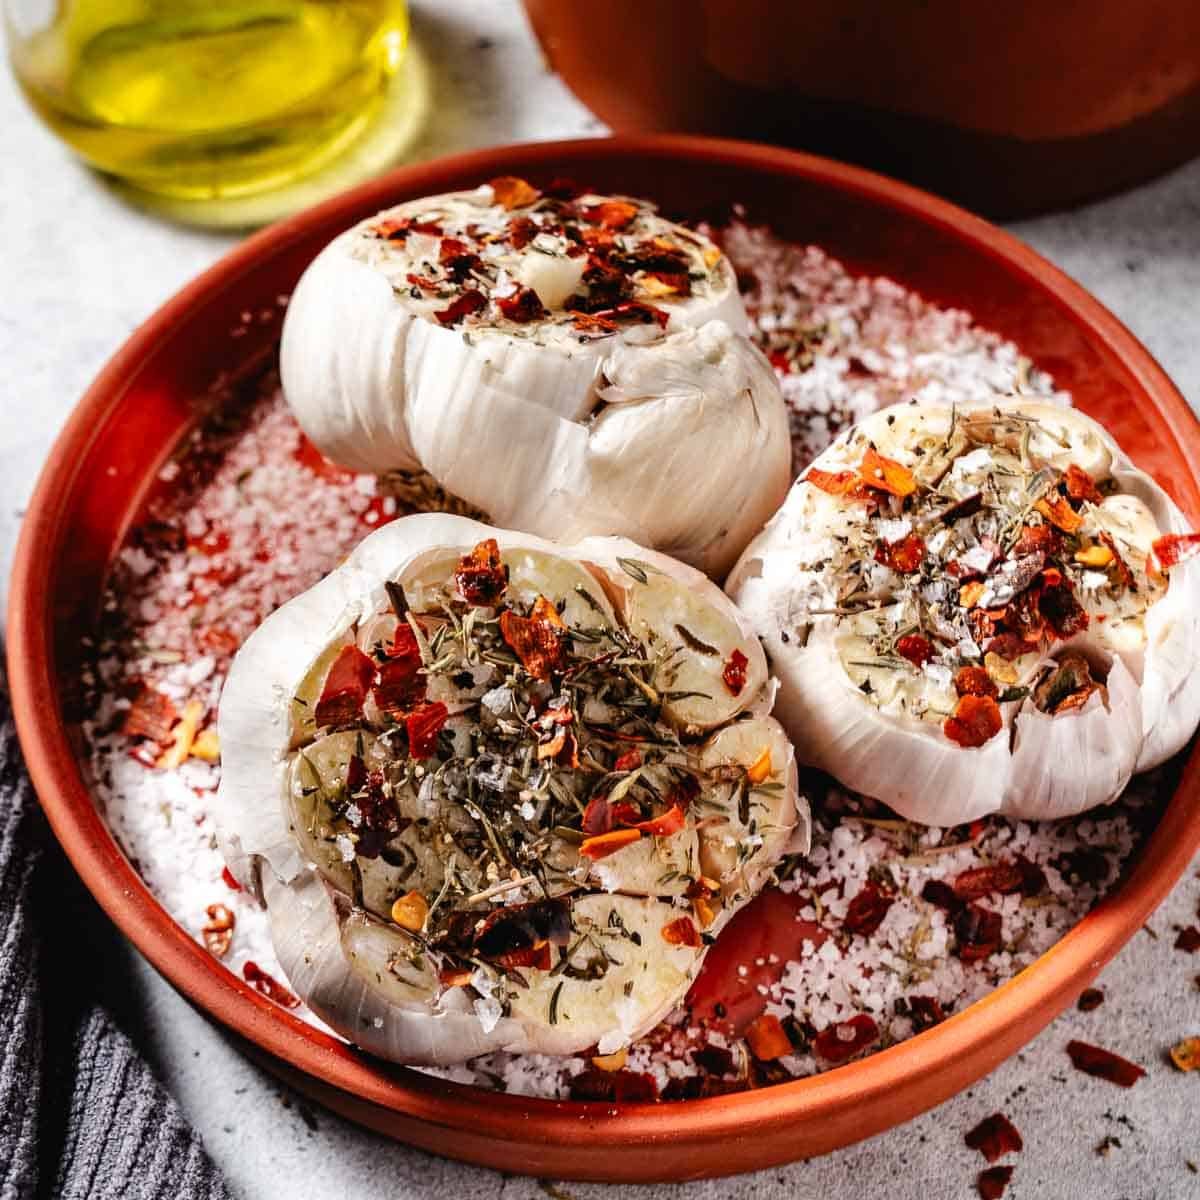
To use it, cut the top off a head of garlic, drizzle with butter or oil, sprinkle with salt, and add some herbs. Then you cover it with the lid and roast it in the oven. After about an hour, the garlic is soft, sweet, and spreadable.

Terracotta vs. Foil Wrapped Roasted Garlic
Roasting garlic in a terracotta baker gives you soft, sweet cloves with a deep, mellow flavor. The clay pot holds in heat and moisture, so the garlic cooks slowly and evenly.
Add a little olive oil or butter, salt, pepper, and herbs, and after about an hour, you've got golden cloves that spread like butter.
Foil works just as well, and it's faster. Here's how to roast garlic in foil.
Wrap the garlic in foil with the same seasonings, and it's ready in about an hour. The texture and taste are nearly identical.
The only real difference? Lifting the lid on the clay pot feels a little more special. The kids will get a kick out of it.
But flavor-wise, there's no big advantage either way.
Ingredients
After 7 batches of roasted garlic, I added red chili flakes. While red chilis add heat to most dishes, they added a lot of flavor to the garlic and its highly recommended. The heat is minimal.
You can fit 3 bulbs of garlic to the roaster. If you only need less, you can roast one or two.
- whole heads of garlic
- extra-virgin olive oil or avocado oil
- kosher or coarse salt
- fresh thyme, oregano, or rosemary
- red chili flakes (optional)
How To Roast Garlic in a Terracotta Baker
Here are easy-to-follow terracotta garlic baker instructions. Once you make it this way, you'll want to roast a few heads at a time and use them all week-in meals, dressings, and pasta dishes.
- Peel off any loose outer skins from the garlic heads, but keep the cloves attached.
- Slide the tip of a knife between the cloves to separate them just a bit without pulling them apart.
- Lay each garlic head on its side and trim off about ¾-inch from the top to expose the cloves.
- Scatter 2 tablespoons of coarse or kosher salt in the bottom of your terracotta garlic roaster.
- Place the garlic cut-side up in the roaster.
- Drizzle ½ tablespoon of olive oil or butter over each bulb and sprinkle with a little salt. Top with a few pieces of fresh thyme or rosemary, and red pepper flakes.
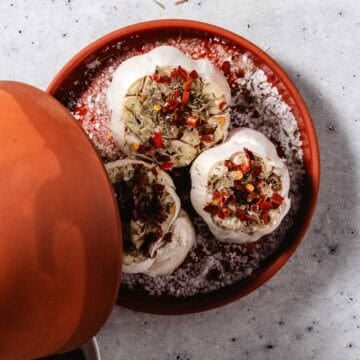
- Cover with the lid, set the roaster on a baking sheet, and place it in the center of a cold oven. Turn the heat to 350°F (176°C).
- Roast for 60 to 90 minutes, or until the cloves are soft, golden, and caramelized. Timing may vary depending on the size of the garlic heads.
- Let the garlic cool until you can handle it.
- To remove the garlic, squeeze from the bottom and the soft cloves will pop right out. Discard the skins.
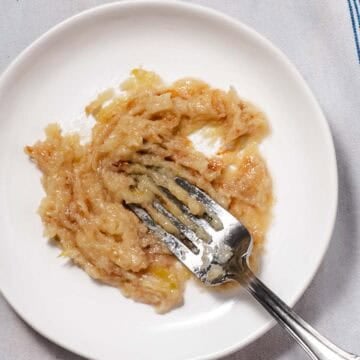
- Use a fork to mash the cloves.
- Spoon the roasted garlic into a small jar or ramekin with a tight lid and refrigerate until ready to use.

Squeezing Out the Garlic
Once the garlic is roasted, simply separate the cloves and squeeze the soft garlic out of its paper wrappers. Mash with the back of a fork and spoon into a ramekin.
You can also squeeze the whole bulb from the bottom, and the garlic will slide right out.
Each bulb of garlic will produce roughly one tablespoon of the smooth puree.

Top Tips
- At the market, choose garlic bulbs that feel firm and heavy for their size. Look for large bulbs with plump cloves.
- If you give the garlic a squeeze and it feels hollow or the cloves squish when you press it, skip it. The outer skin should be dry and tight, not flaky or peeling.
- Soak the terracotta garlic baker in water for 15 minutes before baking.
- Line the bottom of the terracotta pot with coarse salt to make cleanup a breeze. Thank you Better Homes and Gardens for the tip!
- After an hour remove the tray from the oven to check if the garlic is finished. Place it back in the oven if it's not tender.
- You can bake 2 or 3 heads at once in a terracotta garlic baker and keep them in the fridge up to 5 days.
- Use the the timing I've provided as a guide. Every oven is different and the size of garlic varies. While it will take only an hour for some garlic, others will need an hour and 15 minutes or even longer.
How To Clean Your Terracotta Garlic Baker
Adding a layer of salt to the bottom tray of the baker helps with cleanup and catches drips. Even if you skip the salt, clean-up is still easy.
Let the baker cool completely before cleaning.
Rinse with warm water with a tiny bit of soap or none at all. The caramelized garlic on the bottom of the pan cleans right up.
Use a soft brush or sponge to wipe away any bits of garlic and herbs.
Let it air dry fully before storing. I don't recommend using the dishwasher. The pot might crack from the high heat.
Storage
Store roasted garlic in an airtight container in the fridge. You can leave the cloves whole or mash them into a paste with a little olive oil to keep it spreadable.
Roasted garlic will stay fresh for about 5 days.
For longer storage, freeze small portions in an ice cube tray, then pop them out and keep in a freezer bag for up to 3 months.
Serving Ideas
- Spread on toast like butter or mix with softened butter to make garlic bread.
- Mix into mashed potatoes.
- Whisk into soups like Salmon Chowder and Green Pea Soup.
- Use as a topping for Roasted Fish, Steak, or burgers.
- Mix roasted garlic into hummus, Guacamole, or other dips.
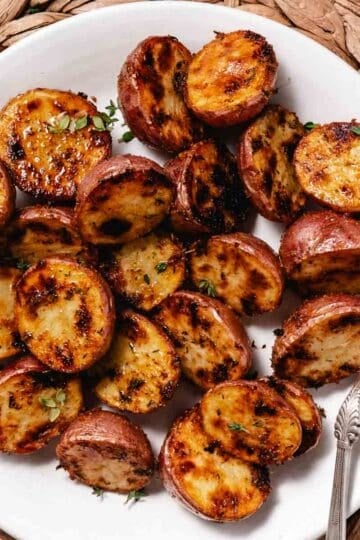
- Toss with Roasted Vegetables such as Roasted Red Potatoes, Broccoli and Carrots, or Brussels Sprouts.
- Use in salad dressings instead of raw garlic.
- Add the mellow garlic to salsa and Pico de Gallo.
- Stir into warm pasta with parmesan cheese.
- Mix mashed roasted garlic with softened butter and herbs to create a great compound butter for spreading over burgers, fish and shrimp.
- Spread on pita chips and top with goat cheese and micro greens.
Takeaway
Raw garlic is sharp and strong, but roasting makes it soft, sweet, and buttery. The heat brings out the natural sugars and adds a rich, deep flavor to the cloves.
Roasting garlic in a Norpro terracotta garlic baker gives you soft, sweet cloves with deep, caramelized flavor. Soak the pot, season the garlic with olive oil, salt, and herbs, and roast for about an hour.
Use roasted garlic in soups, pasta, salad dressings, or anywhere you want rich garlic flavor without the bite of raw garlic. It also makes a great nutrient-dense condiment. Try spreading it on toast or spreading on burgers instead of sugary ketchup.
Wash your garlic baker in warm water. Use a tiny bit of soap if needed.
If you've got one tucked away, dust it off! It's fun to use, and the results are worth it!
FAQ
Olive oil helps with caramelization. Of course, you can roast the garlic without oil, but the garlic cloves could dry during roasting.
Yes. Butter gives the garlic a rich flavor. You can also use a mix of both or leave the garlic dry for a more concentrated taste.
The flavor and texture are nearly the same. Foil is faster and easier to clean, but the terracotta pot holds heat better and looks great for serving.
Squeeze the cloves out and store them in a small airtight container in the fridge. They'll keep for up to a week. Add a little olive oil to cover if you want extra flavor and moisture.
Drizzle it with a little extra olive.
Sprinkle with chopped fresh herbs like parsley, thyme, or rosemary.
Add a pinch of flaky salt and coarse pepper just before serving.
Serve it with lemon zest or a squeeze of lemon juice.
Top with a few red pepper flakes for a little heat.

Terracotta Roasted Garlic Recipe
Ingredients
- 3 whole heads of garlic
- 1 ½ tablespoons extra-virgin olive oil or avocado oil
- ½ teaspoon salt
- 1 teaspoon fresh or dried thyme, oregano, or rosemary
- 1 teaspoon red chili flakes (optional)
FOR THE PAN
- 2 tablespoons coarse or kosher salt
Instructions
- Peel off any loose outer skins from the garlic heads, but keep the cloves attached.
- Slide the tip of a knife between the cloves to separate them just a bit without pulling them apart.
- Lay each garlic head on its side and trim off about ¾-inch from the top to expose the cloves.

- Scatter 2 tablespoons of coarse or kosher salt in the bottom of your terracotta garlic roaster.
- Place the garlic cut-side up in your terracotta garlic baker.
- Drizzle ½ tablespoon of olive oil or butter over each bulb and sprinkle with a little salt. Top with a few pieces of fresh thyme or rosemary, and red pepper flakes.
- Cover with the lid, set the roaster on a baking sheet, and place it in the center of a cold oven. Turn the heat to 350°F (176°C).
- Roast for 60 to 90 minutes, or until the cloves are soft, golden, and caramelized. Timing may vary depending on the size of the garlic heads.
- Let the garlic cool until safe to handle.
- To remove the garlic, squeeze from the bottom and the soft cloves will pop right out. Discard the skins.
- Use a fork to mash the cloves.
- Spoon the roasted garlic into a small jar or ramekin with a tight lid and refrigerate until ready to use.


Monique says
This works perfectly!