Learn how to cook chicken breast in a cast iron skillet for perfectly seared, juicy results every time. You can cook restaurant-style pan-seared chicken on the stove in less than 30 minutes.

One of the best ways to stay prepared is by making a Sunday batch to keep the fridge stocked with delicious, ready-to-go chicken for salads and sandwiches throughout the week. It's the perfect recipe for simple, tasty meal prep!
Jump to:
- What You Need
- What Kind of Chicken Should I Use?
- Equipment You'll Need
- How to Pound Chicken With a Mallet (optional step)
- Chicken Breast Marinade
- How To Cook Cast Iron Chicken Breast
- Storage and Reheating
- Uses for Leftover Grilled Chicken Breast
- How To Clean a Cast Iron Grill Pan
- Takeaway
- What Goes with Grilled Chicken?
- More Cast-Iron Pan Recipes
- FAQ
- How To Cook Chicken Breast In A Cast Iron Skillet
What You Need
- Boneless skinless chicken breasts or chicken thighs
- Olive oil or avocado oil
- Lemon juice
- Italian seasoning
- Red pepper flakes
- Fresh garlic or garlic powder
- Onion powder
- Kosher salt
- Freshly ground black pepper
- Fresh herbs (parsley, basil, oregano, etc.) for garnish
- Lemon wedges for garnish
- Cooking spray
What Kind of Chicken Should I Use?
Boneless chicken breasts are perfect for this recipe, but bone-in chicken breasts and boneless chicken thighs work just as well. If using bone-in chicken, add a few extra minutes to the cooking time so the meat cooks through.
For the best flavor, I recommend pasture-raised or organic chicken. I like to stock up on whole organic chickens when they're on sale and butcher them myself-it's a great way to save money and get high-quality cuts.
To make meal prep easy, portion the chicken into freezer bags, labeling the bags with date and weight.
Equipment You'll Need
- I'm using a square Lodge cast iron grill pan for indoor grilling. It creates nice BBQ grill marks.
- You can also use a 12-inch round cast iron skillet with a silicon handle or a large heavy-bottomed frying pan or skillet.
- Meat mallet
- Tongs
- Meat thermometer
- Ziploc Bags
Remember, your kitchen may get a bit smokey when using cast iron, so turn on the exhaust fan.
Before heating the pan, lightly spray or brush the pan with oil to prevent. sticking.

How to Pound Chicken With a Mallet (optional step)
To help the chicken cook evenly, lightly pound it with a mallet. This quick step prevents the thinner pieces of chicken from drying out.
- Place the chicken breasts in a large zip-top bag or between two sheets of parchment paper in a single layer.
- Using the flat side of a meat mallet, gently pound the thickest parts until the chicken is an even thickness.

Chicken Breast Marinade
- Pour the olive oil lemon juice, Italian seasoning, garlic, red pepper flakes, salt and pepper into a large zip-top bag and toss to combine evenly.
- Toss the mixture to combine, then add the chicken. Toss again.
- Place the bag or container in the refrigerator for a minimum of 15 minutes to allow the flavors to blend. You can marinate up to 24 hours.
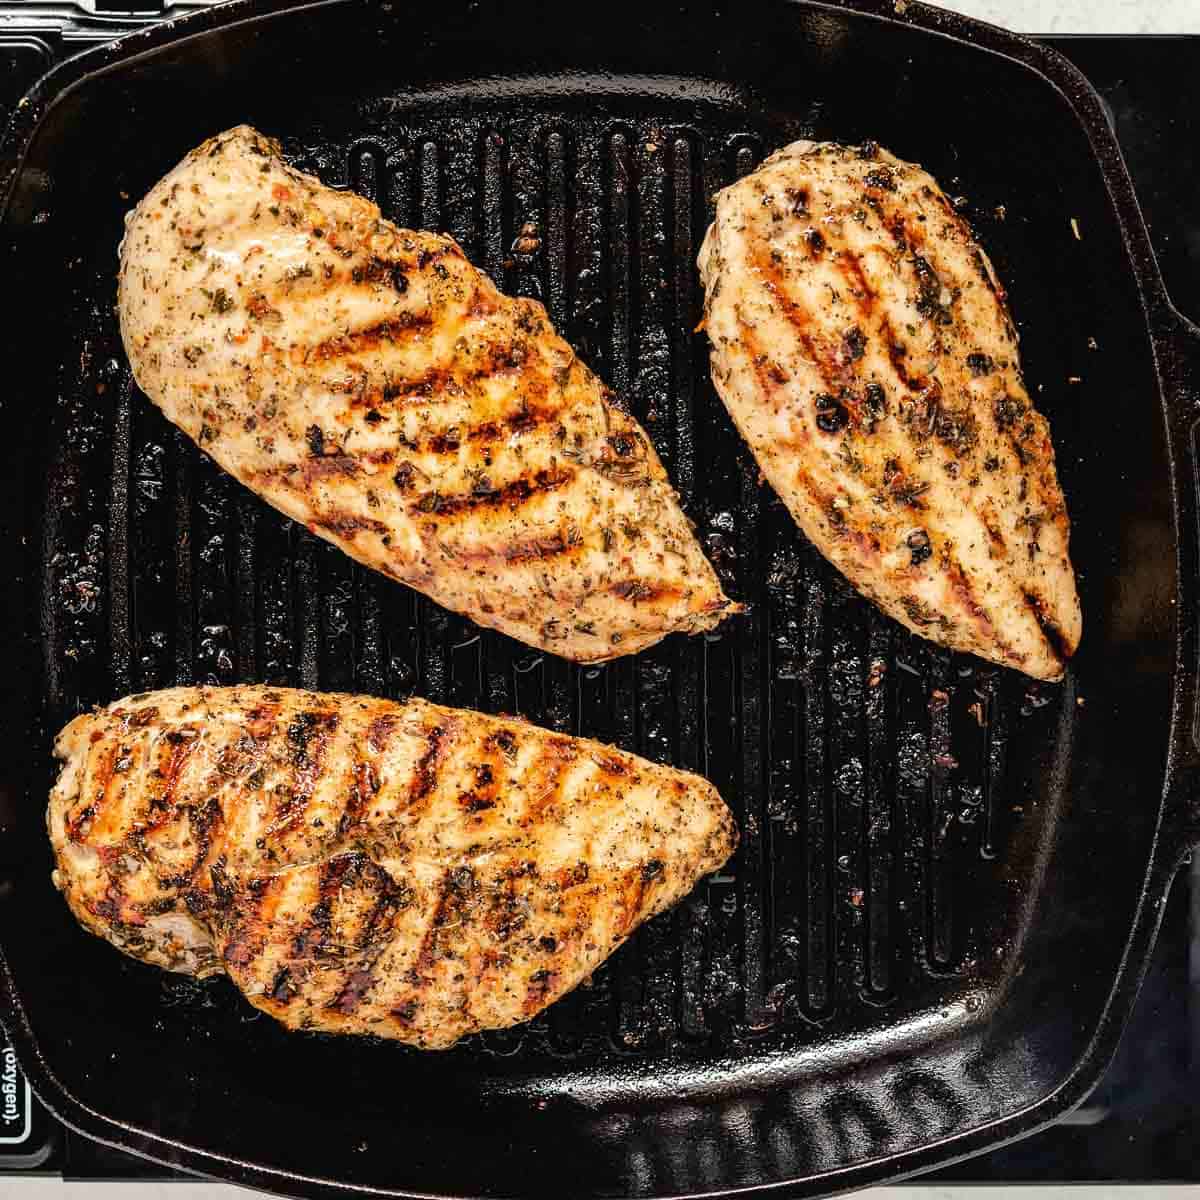
How To Cook Cast Iron Chicken Breast
- Five minutes before you're ready to cook, poull the chicken from the fridge. Spray the pan with cooking spray or brush it with oil. Heat the pan over medium-high heat for 4-5 minutes until it's very hot. Turn on your exhaust fan.
- Remove the chicken from the marinade and lightly shake off any excess oil.
- Place the chicken breasts on the hot cast iron pan and cook undisturbed for four minutes to develop grill marks.
- Flip the chicken and cook for another four to five minutes, checking that its internal temperature reaches 165°F (75°C) on an instant-read meat thermometer.
- Move the cooked chicken breasts to a plate and let them rest for a few minutes so the juices redistribute and the chicken becomes tender.
- Garnish with chopped parley and serve hot.
Storage and Reheating
- Store leftover chicken in an airtight container or zip-top bag in the refrigerator for 3 to 4 days.
- For more extended storage, freeze the cooked chicken in a Ziploc for up to one month.
- To reheat in the microwave, place the grilled chicken on a microwave-safe plate (not plastic) and cover it with a damp paper towel to keep it moist. Microwave on high in 30-second intervals until heated through, flipping halfway.
- For oven reheating, preheat to 350°F (175°C). Place the cooked chicken on a parchment-lined baking sheet. Cover with foil and bake for 10-15 minutes.
Uses for Leftover Grilled Chicken Breast
- Classic Low-Carb Caesar Salad
- Keto Chicken Soup In An Instant Pot
- Strawberry Spinach Salad
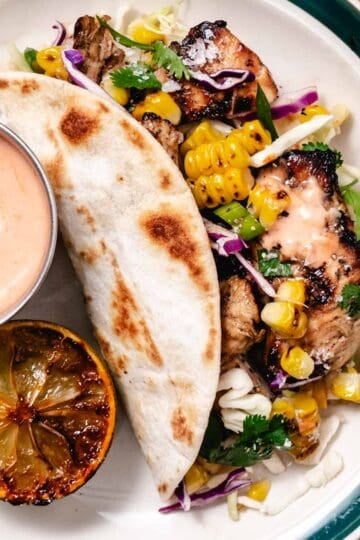
- Grilled Chicken Tacos
- Fried Rice
- Chicken Quesadillas
- Chicken Pasta
- Chicken Wraps
- BBQ Chicken Pizza
- Chicken Stir-Fry
How To Clean a Cast Iron Grill Pan
To clean the pan, let it cool completely. Using a dish brush, scrape off any leftover food bits getting into the grooves. Rinse it under warm water.
Dry the pan with a dish towel before storing.
Cleaning a cast iron skillet with soap is controversial. While some home cooks avoid it, others find a little soap removes tough grease. I use a little soap.
What to Do If You Find Rust: If your pan looks rusted, it can be revitalized quickly!
- Lightly spray oil on the pan.
- Place it in a 200°F oven for a few hours.
It will come out like new!
Takeaway
Get perfectly juicy cast iron chicken breasts with this super easy stovetop recipe. With just a few pantry staples, you'll have deliciously seared chicken every time. All you need is a well-seasoned cast iron skillet or grill pan. No grill pan? No worries-any heavy-bottomed skillet will work just fine!
Let your skillet cool before washing to prevent damage. Use a brush to clean the grooves, then towel dry thoroughly to maintain its seasoning.
Enjoy this low-carb, keto, gluten-free, paleo-friendly dish in salads, pasta, or steamed broccoli and rice. It's a simple, delicious meal loved by all!

FAQ
Yes, you can use a non-stick skillet, but a cast iron skillet is better for getting even heat and that perfect sear. If you don't have cast iron, a heavy-bottomed stainless steel pan is a great option too.
Yes, but it's best to mix butter with an equal amount of oil to prevent it from burning. Adding butter towards the end of cooking can enhance flavor.
The grill pan can be. a little tricky for cleaning. The key is to let it cool down first, then use a brush or scraper to get any food bits out of the grooves. Rinse it under warm water with a little dish soap, and make sure to dry it well to prevent rust.

How To Cook Chicken Breast In A Cast Iron Skillet
Ingredients
- 1 ½ pounds skinless, boneless chicken breasts
- ½ cup olive oil
- 1 lemon, juice (2 tablespoons lemon juice)
- 1 tablespoon Italian seasoning found in the spice aisle of the grocery store
- 1 teaspoon minced garlic or ½ teaspoon garlic powder
- 1 teaspoon red pepper flakes
- 1 teaspoon kosher salt
- ½ teaspoon black pepper
- Fresh herbs (parsley, basil, oregano, etc.) for garnish
- Lemon wedges for garnish
- Cooking spray
Instructions
- Place the chicken breasts in a large zip-top bag or between two sheets of parchment paper in a single layer. Using the flat side of a meat mallet, pound the thickest parts until the chicken is an even thickness.
- Pour the olive oil lemon juice, Italian seasoning, garlic, red pepper flakes, salt and pepper into a large zip-top bag and toss to combine evenly. Toss the mixture to combine, then add the chicken. Toss again.

- Place the bag or container in the refrigerator for 15 to 30 minutes to allow the flavors to blend.
- Five minutes before you're ready to cook, pull the chicken fron the fridge. Spray the pan with cooking spray or brush it with oil. Heat the pan over medium-high heat for 4-5 minutes until it's very hot. Turn on your exhaust fan.
- Remove the chicken from the marinade and lightly shake off any excess oil.
- Place the chicken breasts on the hot pan and cook undisturbed for four minutes to develop grill marks.

- Flip the chicken and cook for another four to five minutes, checking that its internal temperature reaches 165°F (75°C) on an instant-read meat thermometer.
- Move the cooked chicken breasts to a plate and let them rest for a few minutes so the juices redistribute and the chicken becomes tender.
- Garnish with fresh herbs and lemon wedges. Serve hot.


Notes
- Store leftover chicken in an airtight container or zip-top bag in the refrigerator for 3 to 4 days.
- For more extended storage, freeze the cooked chicken in an airtight container for up to one month.
- To reheat in the microwave, place the grilled chicken on a microwave-safe plate and cover it with a damp paper towel to keep it moist. Microwave on high in 30-second intervals until heated through, flipping halfway.
- For oven reheating, preheat to 350°F (175°C). Place the cooked chicken on a parchment-lined baking sheet. Cover with foil and bake for 10-15 minutes.